Spring is now in full bloom and people are spending more time outside mowing the lawn, planting their gardens, and cleaning out their garages. When it comes to organization, you can spend hundreds, even thousands on garage organizational systems at your big box hardware store or you can purchase some Ductmaster™ Support Webbing and make your own.
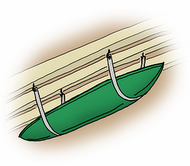
Ductmaster™ Support Webbing
The Ductmaster™ Support Webbing can hold up to 450 lbs if you buy the lightweight variety or if you purchase the heavy weight variety, it will hold up to 640 lbs.
There are two different ways to set the straps. You can set the straps so each end is on a different S-hook. This means you will need to double the number of s-hooks needed. For instance, if you are going to put in 6 boards, which means you would have to have 36 s-hooks. Or, you can make a loop out of the webbing which means you would only need 18 s-hooks. Depending on how far apart your joists are, I recommend using the minimum of 6 s-hooks per board for better weight distribution and you can stack higher.
Ductmaster webbingWarning: Ensure the straps are higher than any persons head so when someone is walking in the garage, they do not hurt themselves by walking into the shelf.Warning: Ensure that you secure your belongings on the boards so they do not fall off should someone bump the shelving. Bungie cords, tie downs, or even netting.
1/2” to 1” plywood depending on the weight – Do not purchase particle board as the garage holds moisture
Plum line or laser line device (some way to make a straight line
Grommets
Grommet Eyelet Setting Pliers
Steps:
Drill holes into the ceiling joists where you want to install the boards. Make sure you have at least 3 s-hooks per board.
Install the S hooks.
Cut the boards down to the length you need them to be (distance between first and last S-hook plus width of webbing x2 + 1”). Leave a 1/2“ margin on either side so the board hangs over the webbing.
Measure the distance from the bottom of the S-hook to the height of the self x2 + width of board + 3”. Don’t forget to add in the thickness of the board
Bend over each end 1-1/4” and install 2-3 grommets per end leaving a 5/8” tail from the grommet.
Install loop just created over the s-hooks do this for all the s-hooks and straps
Install the boards and either nail or screw the boards to the straps. This will ensure that the boards do not slip out of the straps.
Carefully stack belongings on top and lastly,
Strap them down so they do not fall off.
Now that you have cleaned your garage, organized everything you can into storage containers, marked those containers, put them up on the new shelves you created, and strap them down, you are ready to enjoy the rest of your summer.